Showing posts with label pre-K. Show all posts

Thursday, January 17, 2013

K.G.3 2-D vs 3-D Shapes

2-D versus 3-D? Flat versus solid? Huh?

I found this to be the most confusing for my students.  We introduced solid shapes to the pre-k classes; but once they got into Kindergarten they really seemed to get it.

Having "real" items for the students to touch and feel is vital here.  Handing them a piece of rectangular notebook paper, then handing them a thick book, helps them FEEL the difference between flat and solid. They can see it, touch it, turn it around...get the full sensory experience between flat and solid.

I spent a lot of time looking for 3-D examples for my students.  Here is a list to help you:

Spheres: any ball, orange, globe, gumball

Cubes: dice, square tissue box, block

Cylinders: coffee can, oatmeal canister, wipe container, tennis ball containers, drum, cork, flashlight, telescope

Cones:  ice cream sugar cone, party hat, megaphone, orange construction/sports cone

Pyramids: Lincoln Log roofs, decorative stone

Prism: rectangular tissue box, pasta box, juice box, crayon box, toothpaste box

The more examples you can give them of each type of 3-D shape, the better for them to see the differences between same and like shapes...which goes along with K.G.2 and K.G.4 AND they can use these for K.G.5, seeing shapes in the world.

Here is a fun K.G.5 example:


Kathy

Monday, January 14, 2013

K.G.2 Shape Identification (and K.G.4)

"Correctly name shapes regardless of their orientations or overall size."

This can be so much fun if you bring art into it.  

You can make cheap rubbing plates with cardboard & liquid glue or sandpaper.

You can print out large shapes, laminate the paper, and roll out snakes from play-doh.  This sheet came from http://www.kidssoup.com/. These two-year olds can't roll the snake, but they're trying to make the squares their way.


You can make fun & seasonal art.


  multi-shapes             -->

 <-- ovals  


 December holidays


cute leprechaun to build on whiteboard!
(from Kidssoup)


<--craft sticks (great for counting sides & vertices)

                    attribute magnets -->


Get out those cookie cutters!
 
How about buying cheap sponges from the dollar store and cutting out shapes from them? Get some painting going on.


Have fun!! Since I really believe MOST Kindergarteners already can recognize the basic shapes, this is the opportunity to introduce the important vocabulary words SIDE, CURVE, VERTEX.


K.G.4 is about comparing shapes using those vocabulary words. So you can bring two standards into one lesson, and combine the standards into hands on activities like above.

One of my other favorite shape activities is using song.  Greg & Steve have a fun song called "Shapes" on their album "We all Live Together Vol. 3."  I first got it from the library then was able to find a copy online a few years ago.  I was not able to find it on iTunes today but Amazon has it in stock.  As the song goes on, it directs you to stand up or sit down based on the shape you have.  The kids love it, and we end up doing it over and over until everyone has had a chance to use each shape.  I have extended it and played Simon Sez with the shapes too. This is the perfect game to use the vocabulary words; ex. "Simon says if you have 3 sides on your shape touch your nose."  "Simon says find another person with the same number of vertices as your shape." 

Literature for this unit:  (all link you to Amazon)
Circus Shapes by Stuart J. Murphy
Tana Hoban - multiple shape books

My local library has a great assortment of books I can check out for this short unit.

Have fun!! Kathy

Friday, January 11, 2013

K.G.1 Positional Words

Here we go...the Geometry domain.

K.G.1
Describe objects in the environment using names of shapes, and describe the relative positions of these objects using terms such as above, below, beside, in front of, behind and next to.

Prior to the common core, I used different objects to work on our positional words.  One of my favorite activities to do with my two and three year olds is to sing a teddy bear song that uses bears (either brought from home or made by the kids) and chairs.

Everyday Mathematics has a cute CD you can get to go along with the Pre-K program.  On it, there is a song about a teddy bear on the chair.  The students play along with the song, manipulating their bears over, under, besides until it falls asleep in their lap at the end.  So much fun but my Kindergarteners would never go along with it; but in a regular classroom it may still work fine.

With my Kindergarteners, I used positional vocabulary as a review workstation.  By the time they are in my Kindergarten level they fully know all 2D shapes, some 3D, and are secure in positional vocabulary.  From a mailbox magazine many years back I found a cute ladybug book.  Here is a shot of it:


The Kindergarteners loved playing with the stamp pads, stamping their fingerprint ladybug where each page told them to.  Once dry, they went back & added legs & antennae.  They cut, assembled & colored the books.  Nice quiet activity, practiced their sight words, and they could help each other.  I usually used this in the late spring, so most had a strong sight word vocabulary by then.

So how do we apply these two activities to the common core?  Easily! 

1 - Ask each child to select a shape - can be a 2D cutout or a 3D item (block, ball, etc) and play a game of Simon Sez!  Simon Sez if you have a sphere put it over your head. Simon Sez if you have a cylinder put it beside you.  You get the idea!  I could easily see multiple rounds of this game, switching shapes in between each round.

2 - I created a worksheet using 2D shapes that you can find here in my TpT store.  The students first have to identify which shape the direction is asking for, then put it in the appropriate spot on the page. This is a great worksheet for whole group, small group or individual assessments.  Check it out!! It also can be used with K.G.2 and K.G.5.

Sunday, January 6, 2013

Kindergarten Common Core Standards for Geometry

Time to tackle the next domain: Geometry.

Personally, I think this could be the most fun domain out of them all. This is the chance for the students to get their hands on materials in an interesting and creative way.  Bringing art into the classroom for this domain is perfect to get those visual and kinesthetic learners' juices flowing!!

So let's look at what we got (all in the handy sidebar to your right as well.)


Identify and describe shapes (squares, circles, triangles, rectangles, hexagons, cubes, cones, cylinders, and spheres).

K.G.1 

Describe objects in the environment using names of shapes, and describe the relative positions of these objects using terms such as above, below, beside, in front of, behind, and next to.

K.G.2

Correctly name shapes regardless of their orientations or overall size.

K.G.3

Identify shapes as two-dimensional (lying in a plane, “flat”) or three-dimensional (“solid”).

K.G.4

Analyze and compare two- and three-dimensional shapes, in different sizes and orientations, using informal language to describe their similarities, differences, parts (e.g., number of sides and vertices/“corners”) and other attributes (e.g., having sides of equal length).

K.G.5

Model shapes in the world by building shapes from components (e.g., sticks and clay balls) and drawing shapes.

K.G.6

Compose simple shapes to form larger shapes. For example, “Can you join these two triangles with full sides touching to make a rectangle?”   


One of the things I notice first is the shapes that they specify: 2D: squares, circles, triangles, rectangles, hexagons and 3D: cubes, cones, cylinders, and spheres

The 2D shapes are very simple, there are no ovals, rhombus, trapezoids, pentagons, octagons...all those shapes that come in the pre-made shape displays you buy from the teaching stores.  I am sure the majority of your students will already know the first four, so why not take this opportunity to expand upon those basic shapes if you can? 

Over the next few days I will be posting my classroom experiences for each of those domains. Hope you find them helpful!

Kathy


Friday, November 9, 2012

Adorable Preschool or Kindergarten Math Game

I was perusing around Pinterest this morning and found this adorable game.  I put in the title Preschool or Kindergarten, but it really can be used for older students as well.

Fun fine motor math game

It in from the site called "Pre-K Pages" and I so wish I was in the classroom right now to try it.


Fun fine motor math game for preschool or kindergarten via www.pre-kpages.com

What little ones would not LOVE this??  By squeezing the tennis ball, the student is strengthening those all important hand muscles needed for fine motor activities and writing.


Thursday, September 27, 2012

Sorting aka K.MD.3

So we are up to the last part of the Measurement and Data domain:  K.MD.3.

Classify objects and count the number of objects in each category.

Explanation: classify objects into given categories; count the number of objects in each category and sort the categories by count.  Keep it to 10 or less.

Seems pretty simple, right?

My young students loved to sort objects; my older students seemed to think it was boring.  Glad this one is only one standard.  The bear families we just used for the Three Bears story come in handy here for sorting; you can use color, size, or a combination of both. 

But isn't it more fun to sort real things?  Give the students a challenge by giving them less obvious objects to sort.  Need your collage drawer organized? Perfect opportunity to use as a learning experience for this standard.  What about bringing in a literacy connection? Are your book baskets getting a little disorganized? This age can easily separate fiction from non-fiction just by looking at the pictures.

Grab a bag of buttons from the craft store. Let them come up with ways to sort them.


 3 Little Firefighters from Amazon


Go outside on a rock hunt; bring them back and let the students explore then sort.  Same thing with leaves, if you live somewhere that the seasons change like I do. 


Liz Sorts It Out from Amazon


This relatively boring standard can turn into a really fun adventure.  Get creative!!!  Of course, once you have your items classified into groups, you can move on to the second part and have them count each group, and place them in quantity order. 

Kathy

Sunday, September 23, 2012

Literature Connections: Fairy Tales part 3

Another great fairy tale to use with different sizes is Goldilocks and the Three Bears.  I originally was not planning on blogging about this story, as everyone knows this one and figured it would be pretty obvious.

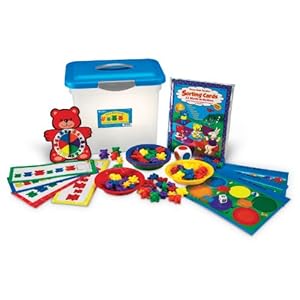
You can even buy a set of "Bear Family" plastic bears.  There are many places out there to get story pieces for this, tons of versions of the story, but then I figured why not?  New teachers may not think this so obvious as those who have been around for a long time.  SO here goes!

Goldilocks is probably the perfect story to practice matching by size. 

Size & Color Teddy CountersBear Family Counters This is an example of just one of the sets out there.


Learning Resources Three Bear Family Sorting Activity (LER0757)


The set I owned came with all sorts of activities and pattern cards and work mats...games, bowls for sorting...Learning Resource Bears

Look at all the great stuff it comes with for not that much more money!  I need to get myself into a creative mood and try to make some of these things for TpT. I am still learning what is copyright infringement and what is not.  :)

Anyway, this is the perfect story to give the kids practice sequencing 3 items by size.
So after choosing your favorite version of The Three Bears (I think there are a million of them!!) I like to use...dun dun dun...

Yep, you guessed it.  The flannelboard is out again.  I have a few sets of these; came from multiple places round the net and curriculum guides.  If you have a keen eye you may have noticed a spoon missing; I have no idea what happened to it!!  So I copied these on cardstock, colored them in, and laminated for durability.  On the back of one set is magnet tape; I find that hot gluing felt to the back of the plastic laminating material does not last.  So anyway, we use these patterns to tell and retell, just like in the other stories previously posted.  We sequence all the items from the bear's house, we match the sizes to each other and to the right bears.  It's a great co-operative activity as well as center.  I love purposely matching the wrong bed to the bear - the kids get a real kick out of it.

Kathy

Thursday, September 20, 2012

Literature Connections: Fairy Tales part 2

One of my favorite big & small stories is Jack & the Beanstalk. Can't get much more of an obvious size difference that this one!

To start, I needed a giant, a Jack and a beanstalk!  KidsSoup has a set of characters; this giant is from there.  My beanstalk is simply a laminated piece of construction paper that I drew a squiggle on, then cut after it was laminated.  I have one part as a hook to keep it on my flannel board or white board.  There is magnet tape on the back of this set - my white board on wheels was the perfect size to drape the beanstalk down, but since I am at home I had to use the flannel board to show you.


The Jack came from a curriculum book I photocopied from the library.  If I can find the title I will edit the post.

Using the patterns from KidsSoup, we would tell and retell the story, and talk about the difference in sizes of big and small things.  This is a repetition of the other big and small lessons, just with a different story.

The science connection made it an essential fairy tale to use.  We planted some seeds (after comparing their sizes) and tracked their growth.  I just brought in some leftover seeds from home; we planted a couple of each, This does take some time, I admit, to allow for growth but it's fun and by the time the plants are tall enough to measure with a ruler, we've moved onto standard measurement, so I look at this lesson as prep for that one!

I know that standard measurement is NOT part of the Kindergarten Common Core Standards; I see it is not really brought in until 2nd grade now. But this is something I can't ignore when the kids are totally capable of reading a ruler. 

Hands on activity for this fairy tale: walk outside to compare GIANT to BIG to SMALL.  We talked about the difference between something that can be called giant versus something we would call big.  It is so important for young students to understand the language of math.  Great opportunity to introduce TINY as well.

Now, these are all lessons I did with my three and four year olds, minus the measuring the plants with a ruler.  They would use non-standard items like cubes.  The CCS are so easy for measurement that this would be doable with your Kindergarten classes and be aligned perfectly.

Art connection: my youngest students got their own Jack and beanstalk, and practiced cutting on the lines.  They "grew" their beanstalk by picking up the center piece (and bounced it up and down a few times) then I would tape it hanging to the wall, cabinet or table (to spread them out) and they got to move their Jack up and down the beanstalk.  Our positional vocabulary of UP, DOWN, TOP, and BOTTOM was reinforced during this time. 

Next time, yet another fairy tale!!

Kathy

Monday, September 17, 2012

Literature Connections: Fairy Tales

Here are some more literature connections to the Kindergarten Common Core Standard for Measurement.  We are still working with K.MD.1 and K.MD.2.

I will be honest with you, I often have a hard time finding a "good" version of fairy tales.  One that will be appropriate to read to a two-year old as well a a Kindergartener.  But I am sure most of you do not have to deal with teaching that varied of an age group, so it's not a problem for most.  I find that fairy tales can be inappropriate in their language for today's generation.   So I most often ad lib while reading, giving my own interpretation of the story, which is what a fairy tale is anyway, right?

For each fairy tale I retell, I have a set of flannelboard or magnetic story pieces to go along with each.  This way I can retell the story on the board, and when I have a version with good illustrations, I can show it after telling that portion.  Plus, it prevents the little smart-alecs who can read from yelling out "that's not what the story says Ms. Kathy!" LOL

Fairy Tale: The Three Billy Goats Gruff

For this fairy tale, the CCS connection is with the different sized goats.  I use this tale to discuss ordinal numbers - which size goat went first, second and third? We reinforce our positional vocabulary with over and under the bridge.

My public library has TONS of versions of the story, as I am sure does yours.  This way you can pick the version you like the best.

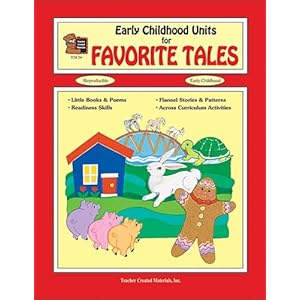
Early Childhood Units for Favorite TalesThe resource I use is: Early Childhood Units for Favorite Tales

This links you to the book on Amazon; I got it as part of a set of 3 or 4 similar books at some point in the past.  Maybe at a book fair? Can't remember.

I claim no ownership of the following images nor do I profit from the posting of them here.

Using patterns from this book I made a slightly larger set of the characters from the story for my white board.  By attaching a small piece of magnet tape, I am ready to go.


Here are my story pieces.


Not the best picture but you get the idea.  After we have told and retold the story, the kids have had a chance to participate in the retelling, and we have practiced using our math vocabulary words, the students get their own set of characters.  Depending on their age, they either get a "coloring" sheet, where they practice following directions like "color the first goat gray."  Getting a bunch of assessments done at once.  I can walk around and jot down a quick note for the kids who struggled with the request.  The older kids get the chance to cut out the pieces and make their own grassy fields for the goats to go from and to.


This is pretty old; it was in my "redo" pile for this school year. :)  All images came from the above shown curriculum book.  I also have one with just a bridge; we can retell the story in other ways with different animals/characters.  This is saved for a workstation.  I forgot something important to mention - the above book also comes with a MINI-BOOK for the students to color and put together.  If you missed my blog post on using "book boxes" you can find it here: Book Boxes

Enjoy!  Kathy

Sunday, September 16, 2012

Measurement: Big & Small

After working on height and length, I then introduced them to the vocabulary words BIG and SMALL.  We discussed in great length how these two words can be used to DESCRIBE sizes in many ways.  Something "big" can either be tall, long, or both.  Something "small" can be short, or short.  Hey - we use the same word in measuring both length & height!  If the kids did not realize it already, which most often they did, we took the opportunity to discuss that many words can have more than one meaning.

Literature to support this unit:


We put on our science caps again and talked about big and small animals, and when time allowed got to look thru books at animals.  I was only teaching math for these lessons, but since I started out teaching science I have never been to fully take that cap off.

The younger classes were given a kinesthetic activity as review.  I held up an item, and they had to "go find" something in the classroom that was either bigger, smaller, taller, longer, or shorter than what I was holding.  They would bring me the item (or if it was not removable like a poster or display I would go to them) and we "measured" or "compared" the items to see if we were correct.  I always took this opportunity to verbalize that I was "lining up" the two items and why we did that.

Kathy

Friday, September 14, 2012

Meaurement: Length

Edit: this post has been getting a lot of views, but my other measurement ones are not. If you you click on Measurement on the right side panel, it will bring up all my posts on measurement for you to review.  Lots of ideas there! 10/29
 
-------------------------------------------------------------------------------------------------------------------------------
Measurement continued!

For the LENGTH lessons, we replaced tall, taller and tallest with LONG, LONGER, LONGEST and HORIZONTAL and reviewed the suffixes and when to use them.  

Those yellow strips came back out and once again we were comparing our strip to each other's strip.  We found our match - the same size, then the two groups found one that was shorter than ours and on that was longer than ours.  Once again, I had the shortest and the longest with me so no one was left out.

Another activity we did was comparing shoe length.  This requires NO advance preparation, fills in a time gap easily, and is fun.  Who doesn't like being able to take off their shoe in school!  Just try not to plan it when you are expecting a fire drill...LOL  Here are some of my pre-K students comparing who's shoe is the "longest" and "shortest."  There is always one kid with really big or really small feet, so you are guaranteed success!


The Long and Short of It


My favorite book to read with this lesson is:


We tie it into science with a discussion of animals and their body parts.   You can offer large picture books and task small groups to find the animal with the longest legs, shortest neck, that kind of thing.


Here is the Kindergarten worksheet that followed.  Great to assess this concept.


This freebie came from Maria at KinderCraze.  You can see the materials on the table - I gave this as a workstation one day.  They cut the strips any where they wanted, then had to sort them appropriately.

Kathy


Thursday, September 13, 2012

Measurement: Height

Measurement: Height!

My school used Everyday Mathematics for many years.  One of my favorite activities from that curriculum I adapted to use with K.MD.1 and K.MD.2.  This activity requires some prep work on your part, but if you laminate the paper before cutting it, it will last you a VERY long time.   

Here is a picture of it in action, then I will explain:


What these two (older threes class) students are doing is comparing two strips of yellow poster board.  I took one regular-sized poster board and laminated it.  I then cut it into ten different sizes strips.  Each size had two strips that matched.  Took a bit of planning, but if you use two pieces of posterboard it may be easier.  The students were randomly handed out a strip.  This was a lesson on height; but was used a second time for length; just hold the strips horizontally instead of vertically.

The students were then charged with the task of finding the strip that was the same size as theirs.  You can see two students lining up the strips and checking to see if they are the same.  Once you found your match, you sat down with your partner so everyone knew you were not available anymore.  This is why you see some students sitting in the background.  Vocabulary for this lesson was: SAME, COMPARE, HEIGHT, VERTICAL.  The next lesson the students again received a strip.  I separated them into two groups; one group stood up with their strips and held them vertically.  The other group had to compare their strip to the standers and find one that was either shorter or longer than someone else's strip.  I made sure to keep one of the shortest and one of the longest strip for me, and when it came close to the end, I would hold up whichever strip was needed and reminded the kids not to forget to compare theirs to mine!  This was no one was stuck with no partner.  I allowed multiples in the partners; the student with a really short strip tended to have a bunch of members from the other team with them at the end.  The searchers then became the standers and the new searchers then had to find the opposite size than had been asked before.  New vocabulary: SHORT, TALL, SHORTER, TALLER.

A third activity had groups of three to five students placing their strips in size order.  This of course is a higher grade level activity, but they were very capable of doing it and they loved the strips.  Vocabulary for that lesson added: SHORTEST and TALLEST.  I used this opportunity to discuss the suffixes -er and -est and when to use them.

Here is my messy portable white board at the end of the ordering sizes lesson. 


Buildings came from KidsSoup.  You can also offer architecture or picture books of buildings and in small groups/centers/workstations have the children look thru the books and discuss the heights of the buildings.  You can turn it into a writing activity as well.

I do use real math vocabulary words with ALL my students. Horizontal  and vertical are not hard words; no words are.  They can learn them just as easily as any other word. 

Kathy

Thursday, September 6, 2012

Best Investment Ever

I think my most favorite "purchased" item that I had in my classroom was my large dice. 

I am fortunate that my school purchased them for me, but unfortunate as I could not take them with me when I left.


Click to View Video and Other ImagesThese are the ones I used: Large Dice

 They are from Discount School Supply and currently retail for $37.  Yeah, that is a lot, but I did not have to pay for them!  :)


I bet you can find cheaper ones.  Or go in on a set with another teacher.


Prior to owning these dice, I had made my own out of square boxes I acquired somewhere.  My home made dice lasted about 3 years, and I was not able to change what each face said.  So one had numerals and the other had dots. 

This is a picture of my "old" dice:

So how did I use the dice?  Oh my gosh is SO many ways!  If you have read some of my early posts, you may remember I am big on being active in the classroom.  Maybe cause my students were all so young, but I feel like even the older students can benefit by them as well.  This set let me put movements into the activity that we may not have normally thought of.


Young students: roll 1 die; start with dots then move up to numerals.  Have 1 student count the dots then choose a movement for the class to do "that many" times.  To get more students involved at once, have one student roll, one count, and another pick the activity.  I used this activity without the dice as we learned about each number; this is a great way to review all numbers you have covered so far, or you can put the same number on each side, so it always comes up "3."  See how long it takes the kids to catch on!  I usually prompt the first few movements, like "clap three times" or "jump three times" (make sure you wear comfy shoes that day) then let the kids take over.  Really gets those wiggles out of the little ones.


Preschool students: you can use the dice as part of a themed activity where they make a physical connection to objects based on the roll of the dice.  Here, the student could roll a die, either read the numeral or count the dots, then "feed" the squirrel that many acorns.  Can be adapted to ANYTHING - put that many apples/leaves/snowflakes on (or take off) a tree; make a tower with that many blocks; count out that many goldfish for snack, you get the idea. 


Pre-Kindergarten students: once your students recognize their numerals add the second die and they can match sets.  Roll the two dice; did you get a match?  Are there more or less dots than the number you rolled?  Could not find pictures of that in action. But...

Kindergarten and first grade: here the students used the big dice in a couple ways, then followed up with a small group and individual activity with small dice.


The rolled the dice and the students tallied on the white board how many times each number came up.  This was partial tally writing and partial probability lesson.  I find this is a great activity to cover both concepts in a fun way.


The students working on their individual tallies.  I asked them to roll their die a specific number of times, like 40.  So they had to keep adding their tallies up to see when they hit 40. :)


Another way we used the big dice was for addition and subtraction practice.  We used the dice as a group activity, counting the dots chorally to add.  I would (or sometimes a student) write the addition sentence on the white board so we could "see" what we just did verbally.  As time went on, the dice were changed to have numerals on them, and we used small manipulatives (coins in this picture) to add. 


For subtraction, I had one dice with numbers 5 and above, and the other dice had 0 - 4.  We had to work harder to find the difference than we did for the sum, but the kids caught on pretty well.  At first we wrote the numbers that we rolled on the board, and figured out which on was "greater." We then wrote the subtraction sentence and added attribute block magnets to represent the larger number.  We took away the smaller number and voila! We found the difference.  Older students can roll the dice to add more than two numbers, multiply, or divide.  Orrrrrrr...you can use it for place value identification. 

Another example of using the dice is in my post titled Making Numbers 5/26/2012.

By using dice that  you can change the faces, you can customize the dice to every activity. I used them once to build a snowman; they students had to roll six different body "parts" to build the "whole" snowman.  But that is a whole other concept!

Does anyone else have big dice they use in their classroom?  Can you share some of your activities?  This is just a small sampling of what can be done.  Hope I've inspired you a bit today, to get those kids up and moving instead of sitting in chairs all day.  Math should be hands on, and fun!!

Kathy

Monday, September 3, 2012

Fall Counting Idea

I decided to start cleaning out my Pinterest boards today, as I've gone a bit overboard on some of them.  Like my recipe boards.  :)  But while I was doing that, I thought I'd ponder thru my Math Center board and came upon this fun idea I had saved.

Fall Leaf Counting

This is a Montessori based blog.  It has a great idea where you use sticky fall leaves, clothespins and ribbons.  I bet you can find the materials pretty cheap at a dollar store.  You can even do this on a clothesline instead of the floor.  :)  Fun, right??


100_7856

Sunday, September 2, 2012

Clothesline Math Game Posted

Okay, one product done and posted!

Clothesline Number Games 0-20

This set includes two spinners, one with four colors and one with six colors.  There are six sets of number cards 0 to 20, and the symbols +, -, =, <, and >.  A pencil and a paperclip finishes the spinner, and all you need is a clothesline, some spring-style clothespins from the dollar store, and a printer!  I suggest printing them on cardstock and/or laminating for longer use. 

Thanks to Graphics From The Pond for the spinners!

Graphics From the Pond


Monday, August 27, 2012

Music in Math

I love music.  I love it not only for my own pleasure, but in my classroom as well.  There was almost always music playing in the background during free time, during lunch time, and I often played jazz or classical during work time; during my circle time we used music every single class.

Some of my favorite background music comes from my time as a Gymboree Teacher.  For almost seven years I enjoyed the wonderful music Gymboree had to offer, and when they added music to the program it was even better.  The music they put together is all content and age appropriate.  They offer a bunch of CDs with each CD being a different genre of music.  I love playing the African CD during free playtime.

My all time favorite for ME is the Surfin Music.  Here is one that is for sale on Amazon: Gymboree Music: Surfin

Other music I use, to teach a specific skill, comes from many sources.  Wee Play offers an abundance (I bought most of mine at Costco) of finger plays and rhymes that I was able to make flannelboards to go with them.

Everyday Mathematics offers a music CD to go along with their curriculum.  Maybe yours does too?

A parent gave me a copy of the CD Movin 2 Math by Jack Hartmann.  I used track #3 Let's Get Fit (Counting to 100 by 1s) almost daily.  Even my three year olds, who could not count to 100, loved doing the exercises.

One song I used soooo much in the springtime is Five Little Butterflies.  I heard it on Barney once, and thought it was adorable.  I made these cute flannel boards to go with the song:


I added the flowers cause my butterflies needed to fly over something.  Anyway, here is the song:


Apparently this comes on a CD too.  Not a big Barney fan, but the kids love the song when I sing it.  So I just don't tell anyone I saw it on Barney. :)  Shhhhhh.....

What music do YOU like to use?

Kathy

Thursday, August 16, 2012

Carrot Picking...or apple...or pumpkin...

One of my favorite activities to do at the beginning of the school year is to "pick apples from the tree."  I had a set of apples with numerals on them that had been handed down to me by a previous teacher; on one wall I had a big seasonal tree leftover from when I taught science.  The type you buy from a teachers supply store.  I put pieces of velcro on the tree, then on the apples.  Or leaves...which look like snowflakes in the winter when all the leaves have fallen off.  We used little pink flowers in the spring.

I used this tree for so many things; one of my favorite was to pick apples.  On the back of each apple there was a number up to 30.  The students would get a chance to pick an apple from a tree, then they had to tell me the number.  I had multiple apples with the same number on it, and would put up the appropriate numerals based on the age of the class coming in.

This is a great way for me to get a sense of numeral recognition at the beginning of the year.  I would keep a running record of which numerals they got correct and incorrect, and as the year went on I could add to it.  This helped me when assessment time of the year came; if they consistently recognized the numeral 3, I did not need to ask them that one.  I also used the apples to make sets; pick an apple then give me "that many" of something. 

Unfortunately my tree got destroyed and I cannot not locate a good picture of it to show you.  But I do have a picture of some young 3s (and visiting toddlers) "Carrot Picking" in our circle time area.  This was an activity I did in May, I think.


The kids had so much fun and did really well taking turns.  This is a simple shape to draw and copy onto colored construction paper.  I laminated a blank piece of green construction paper and made the tops, then taped them on.  Super quick and easy!  I know EVERYONE has an apple graphic somewhere in their files, and I bet everyone has a pumpkin too.  Fun hands-on activity, helps practice taking turns too.  My Kindergarteners had to pick two carrots and tell me the sum or difference, depending on the unit.  Great workstation if you have the space.  Let's those boys who need some movement in their learning get it out.

Hmmmm....bet you could have the kids order or group the numbers on  a clothesline... :)

Enjoy!  Kathy

Monday, August 13, 2012

Clothesline Fun

I am working on a product for the clothesline activity I mentioned a few posts back.  I am trying to decide what pictures to include.  A clothesline does not need to be used with only "clothes" but they sure make it more fun.  I love how the spring clothespins strengthen the hand and finger muscles that are oh so important for writing.

So I am thinking some seasonal clothes; short sleeve shirt and shorts; long sleeve shirt and pants; hat and mittens; tank top and of course socks.

So what is the problem you may wonder? Finding the clipart that I can legally use and sell with my product. I don't draw well enough on my own.

Does anyone have favorite clipart sites they want to share with me?

Kathy

Thursday, August 2, 2012

Using Literature in Math & Book Boxes

Howdy folks!

As I have mentioned before, I LOVE using literature as part of my math (and science) lessons.  I will eventually get to talking about science, I promise.  Math is most recent for me, so it is freshest in my thoughts.

Anyway, here is a great list of math-related literature:

Love 2 Learn 2 Day

I have personally used almost ALL of the Stuart J. Murphy books.  I was lucky to work at a school that owned almost the whole complete set; it was so great the have these books at my disposal.  There were a few titles I needed to get from the library, but the majority sat on my desk.

I also was the proud owner of the NumberTales series from Scholastic.  These two were a great series, if you have ever used AlphaTales you know what I mean.  The set came with a Teachers Guide with worksheets, mini books and other activities.  I loved the mini-books; the students could have their own copy of the story to put in their book boxes for free reading.

What is a book box?  Basically, it's a small shoe box that the students use to collect the books they make throughout the school year.  During quiet times, free read times, or as a center, the students get their box off a shelf and read over books they have created.  These books come from all the subjects; when I taught science I think I provided more books for the box than the literacy teacher. :)

I will admit that the boxes took up a lot of space, but it was well worth it.  Since my students were still young, the boxes were on the smaller side.  Not sure you can do this with older children who have giant feet.  I wish I had a picture to show you! I have no pictures from my first four years of teaching, and during my last three years they stopped using the boxes.  Much to my dismay.  But I continued to make the books....hee hee.

Another option to shoe boxes would be to use file folders; you can buy ones like these that expand on the sides and are already sealed on three of the sides.


The kids can "check out" their folders to bring home and share with their families, or they can be wonderful things to have out for waiting parents during conferences or back to school nights.


 One of the things I love the most about the book boxes is how proud the kids are of their work when they go back and to read and re-read their books.   I have had students proudly show me books they made at the beginning of the year, comparing to what they just made, and they can see their own growth.  They can see how much better they write, or color, or even cut & fold.  The students notice their own progress!

Kathy

Friday, July 20, 2012

Pre-K Assessment

I have put together an assessment to be used for pre-kindergarten students.  I know most of my followers are Kindergarten aged teachers, but this could be helpful for the beginning of the year to see what skills your students are coming in with.  It's very basic, and I created it with the Kindergarten Common Core Standards in mind.

You can find it at my TpT store: Pre Kindergarten Math Assessment

And yes, I finally got borders to work!  This was one document that I wanted them for.  I ended up only using on on the cover page.  The assessment includes a set of number cards at the end.  My plan was to put a border on each card, then I realized if I am designing these for the students to cut out, single basic lines are best.  After all, this is designed for 4 year olds!

When going back and looking at the assessment, it makes me realize what these students are capable of at such a young age.  The school I worked at the last seven years was considered an "academic" preschool; each year was going a grade level above what would normally be expected of them.  I had a conversation one day with a Facebook friend; she was so proud of her son, who was just turning 5, that he had written his name "almost legibly" (her words) for the first time!  It brought me back to reality, as I was used to my students.  My incoming pre-kindergarten students were writing their names legibly on a daily basis.  Part of our three-year old program included writing first names, in pre-K they learned to write their last name.  So back to my friend; she posted pictures on Facebook, so very proud; and it really made me think about the difference in a school like mine, the 3 hour twice a week preschool her son went to, and even the kids who do not have any previous schooling prior to entering Kindergarten.  These students are all over the place, and you wonderful ladies deal with it every school start.  So kudos to you!!!  Having a differentiated program in each and every classroom is so important.  I don't see as much of that; if you can afford to send your child to where I taught, then your child (unless there was a learning disability) was prepared for what we expected.

I hope my assessment is found to be helpful; I designed it to be used three times, so growth of knowledge can be documented.  It is multiple pages, so you can do as much or as little as time allows.  When a student has "mastered" that page, it does not need to be repeated.

Well, off to errands, in the rain.  Sigh.   But I guess it's not 100 degrees again, so should be thankful for that.

Have a great weekend everyone!  Kathy